Rerouting AC and DC cables and Data Harness for Runke Charger Installation EL09-E-005
1. Remove Front Fairing Right. Refer to S-XC-S10900 S10800
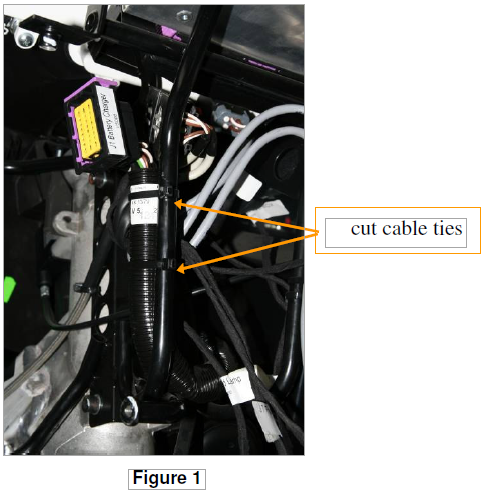
2. Cut and remove nylon cable ties used to fasten data cable to front sub-frame.
See Figure 1.
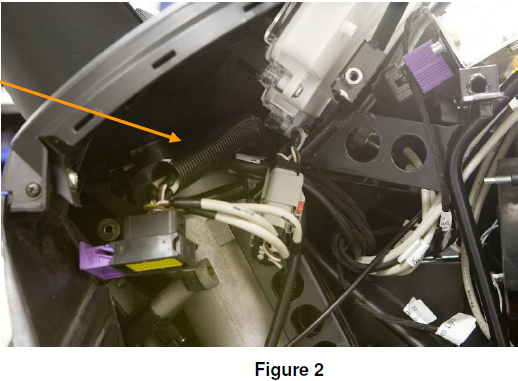
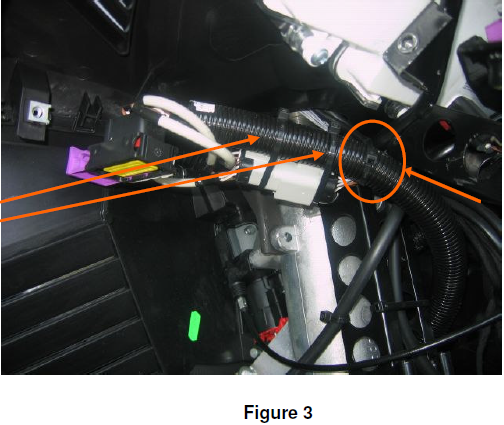
3. Reroute Data cable over the top of the front sub-frame as shown.See Figures 2 and 3.
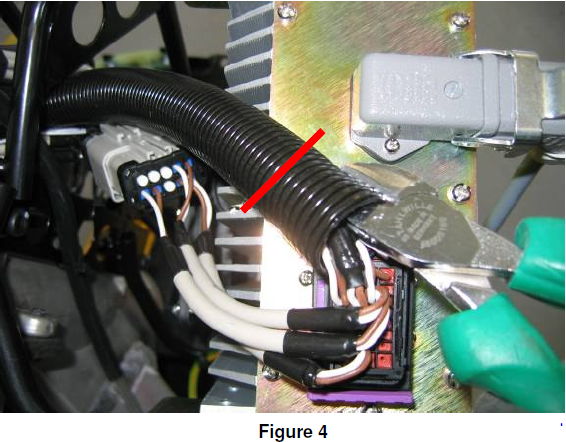
4. Remove 2 cm of the plastic tube on the I/O harness. See figure 4
PAY SPECIAL ATTENTION NOT TO CUT ANY CABLES INSIDE
5. Remove the step through panel to access the AC and DC cables. Refer to S-XC-S00168
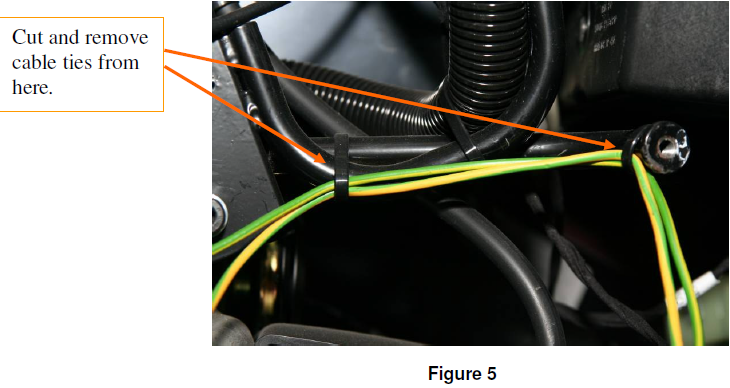
6. Cut and remove nylon cable ties used to fasten AC ground wires to sub-frameif applicable. See Figure 5.
7. Cut and remove nylon cable ties used to fasten AC and DC cables to vent tube.
8. Pull the DC cable only out from under the footrest bracket.
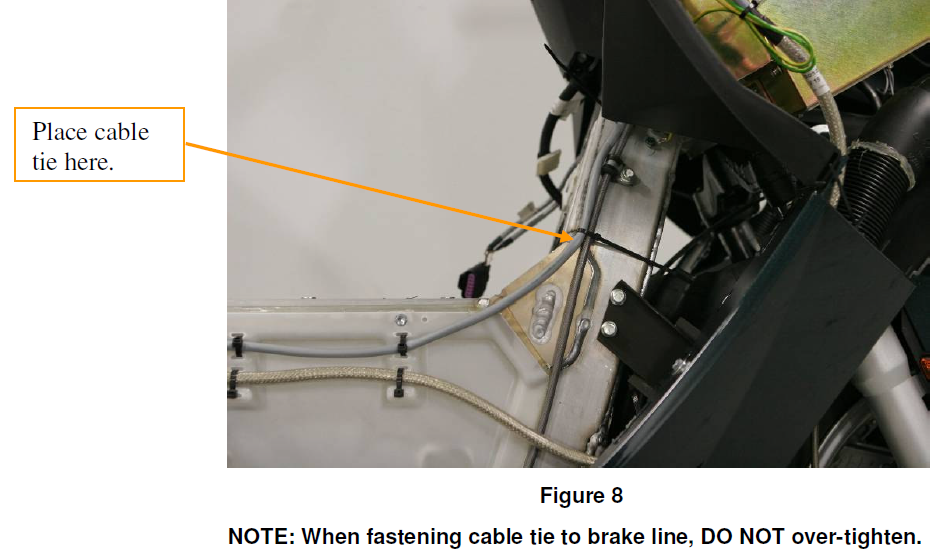
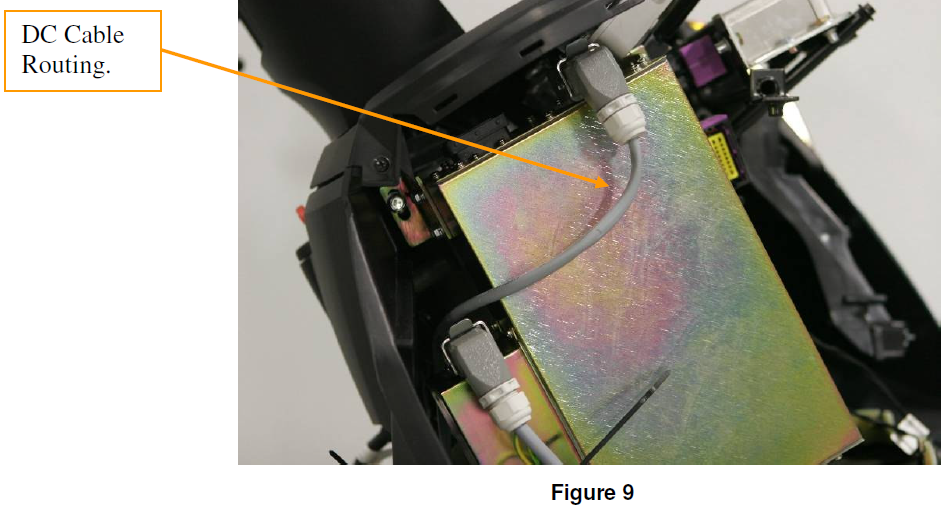
9. Reroute the DC cable as shown in Figure 8 and Figure 9
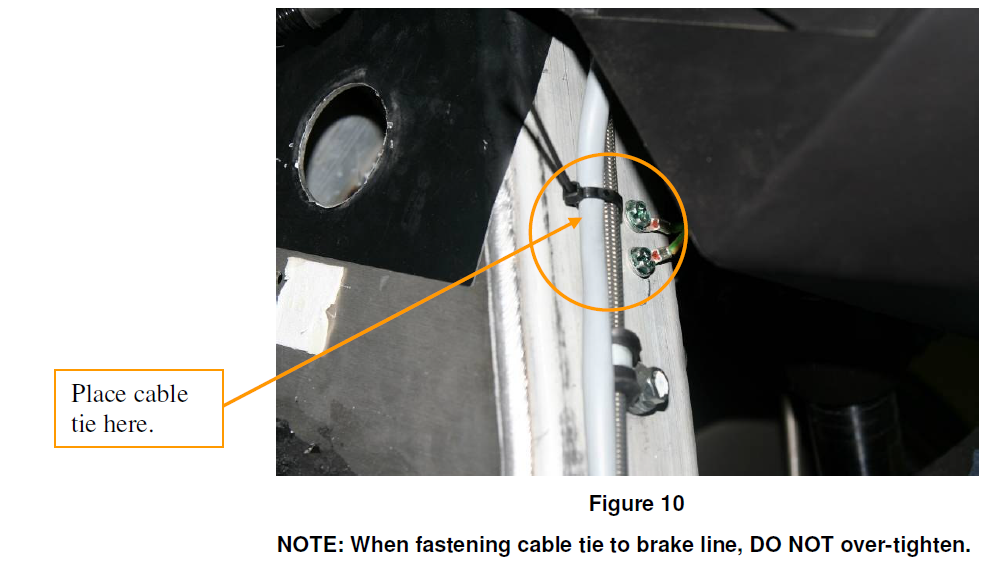
10. Using the ground screws as landmark, place cable tie in location specified in figure 10
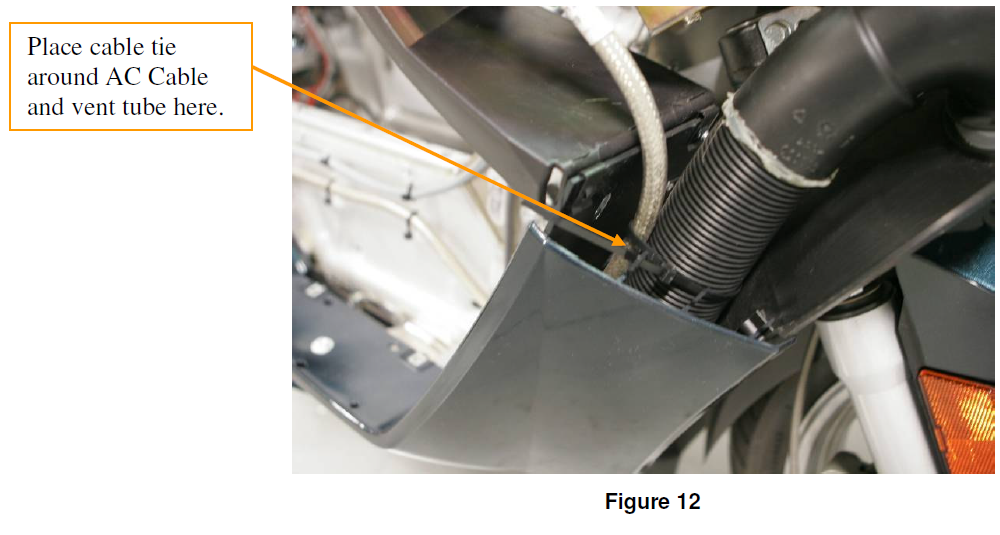
11. Fasten the AC cable to the vent tube. See Figures 11 and 12.

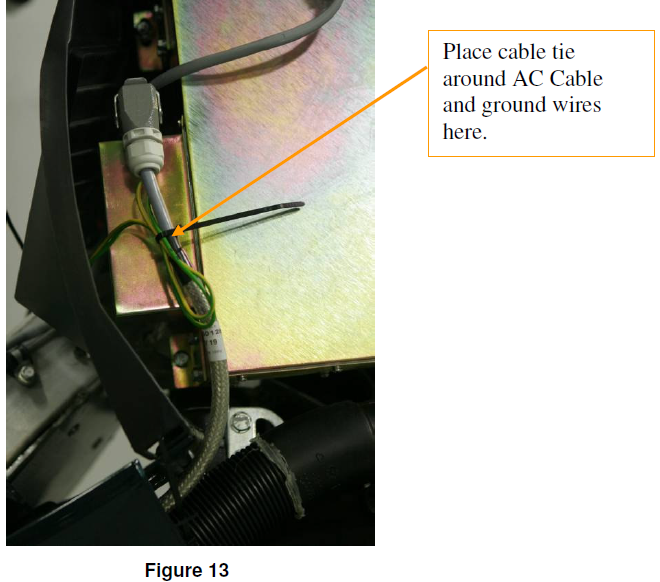
12. Fold the ground wires, leaving slight slack at grounding screws, and fasten to AC cable with cable tie. See Figure 13.
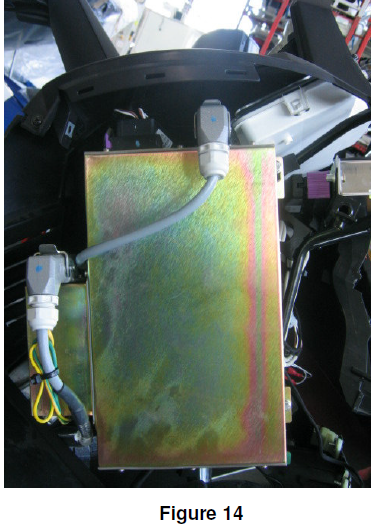
13. Final Runke Charger installation should look as in Figure 14.
Customer support service by UserEcho