VX-1 with oryginal Li/Li+ - basic recover procedure
VX-1 Li / Li+ proceeding
- Make sure you have the latest diagnostic installed – Rev 1.0.1.1 from October 2012
- Upgrade software to the newest
- BC - EVPS LiFe 40s-3
- MC - MCR2042-4
- ICM - ICM DIY_1708
- BMS - GPLiBMS R54
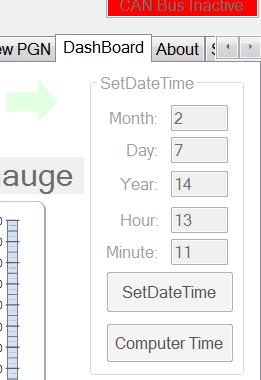
- Setup correct date and time (DashBoard page of diagnostic): press "Computer Time", press "SetDateTime"
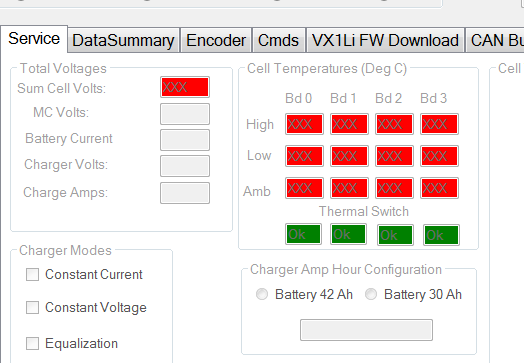
- Setup the correct battery capacity – if you are not sure, open the battery box and check height of the cells. 30Ah cells fill up around ¾ of the box, 42Ah cells fill up almost fully the box.
- Charge scooter to full – till you see on the odometer display EC49 (afer charging stopped, without removing charging cord plug from socket, turn ignition key to see termination code). It can take very long. If after few days is still not completed consider charging lowest cells by external charger.
- Perform the test ride – with a normal, not very aggressive ride discharge battery completely (till the bars of battery level disappear and red light of battery flash)
- Fully charge battery
- Download the riding history, check the Charged Amphrs - this is your actual effective capacity of battery.
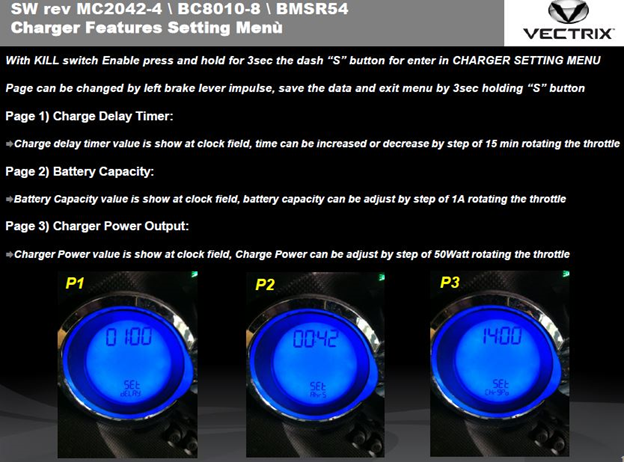
- Adjust the battery capacity stored in charger to the real one +2Ah (for example if the real one is 36Ah – set up 38Ah) – see below instruction of adjusting the charger.
Customer support service by UserEcho